はじめに
前回Dockerコンテナの中で起動できるようにしたVueプロジェクトにVue-routerを導入して、ルーティングを行います。
Vue-routerのインストール
Dockerfileを修正してVue-routerをインストールします。
FROM node:18.15.0

SHELL ["/bin/bash", "-c"]

RUN mkdir workspace

COPY . workspace

WORKDIR /workspace

RUN npm install

RUN npm fund

RUN npm install vue-router@4 # <----追加App.vueの編集
<script setup lang="ts">
import { Authenticator } from "@aws-amplify/ui-vue";
import "@aws-amplify/ui-vue/styles.css";
</script>

<template>
  <main>
    <authenticator>
      <template v-slot="{ user, signOut }">
        <h1>Hello {{user?.signInDetails?.loginId}}'s todos</h1>
        <router-view /> // <---編集
        <button @click="signOut">Sign Out</button>
      </template>
    </authenticator>
  </main>
</template>
Test.vueの作成
src/componentsにTest.vueを作成します。
<template>
  <authenticator>
    <main>
      <h1>My todos</h1>
      <router-link to="/">次へ</router-link>
    </main>
  </authenticator>
</template>
Todos.vueの編集
<script setup lang="ts">
import '@/assets/main.css';
import { onMounted, ref } from 'vue';
import type { Schema } from '../../amplify/data/resource';
import { generateClient } from 'aws-amplify/data';

const client = generateClient<Schema>();

// create a reactive reference to the array of todos
const todos = ref<Array<Schema['Todo']["type"]>>([]);

function listTodos() {
  client.models.Todo.observeQuery().subscribe({
    next: ({ items, isSynced }) => {
      todos.value = items
     },
  });
}

function createTodo() {
  client.models.Todo.create({
    content: window.prompt("Todo content")
  }).then(() => {
    // After creating a new todo, update the list of todos
    listTodos();
  });
}

function deleteTodo(id: string) {
  client.models.Todo.delete({ id })
}

// fetch todos when the component is mounted
 onMounted(() => {
  listTodos();
});

</script>

<template>
  <main>
    <h1>My todos</h1>
    <button @click="createTodo">+ new</button>
    <ul>
      <li
        v-for="todo in todos"
        :key="todo.id"
        @click="deleteTodo(todo.id)">
        {{ todo.content }}
      </li>
    </ul>
    <div>
      🥳 App successfully hosted. Try creating a new todo.
      <br />
      <a href="https://docs.amplify.aws/gen2/start/quickstart/nextjs-pages-router/">
        Review next steps of this tutorial.
      </a>
    </div>
    <router-link to="/test">次へ</router-link> // 追加
  </main>
</template>
index.tsの作成
srcフォルダの下にrouterフォルダを作成します。
その中にindex.jsを作成します。
// Vue Routerパッケージのインポート
import {createRouter, createWebHistory} from 'vue-router';
import Test from '../components/Test.vue';
import Todos from '../components/Todos.vue';

// ルートの追加
const routes = [
  {
    path: '/',
    name: 'Todos',
    component: Todos,
  },
  {
    path: '/test',
    name: 'test',
    component: Test,
  },
  {
    path: '/:catchAll(.*)',
    redirect: '/'
  }
];

const router = createRouter({
  history: createWebHistory(import.meta.env.BASE_URL),
  routes
})

router.beforeEach((to, from) => {
  // URL直接入力の場合はTOPへ
  if (to.path != '/' && from.name == undefined) {
    return '/'
  }
})

export default router
main.tsの編集
import "./assets/main.css";
import { createApp } from "vue";
import App from "./App.vue";
import { Amplify } from "aws-amplify";
import outputs from "../amplify_outputs.json";
import router from './router'; // 追加

Amplify.configure(outputs);

const app = createApp(App); // 編集
app.use(router); // 編集
app.mount('#app'); // 編集
コンテナの起動
コンテナを起動します。
docker compose up -dコンテナの中に入ります。
docker exec -it amplify-vue-template-app-1 bash確認
フロントエンド環境を起動します。
npm run devhttp://localhost:5173/にアクセスし、ログインします。
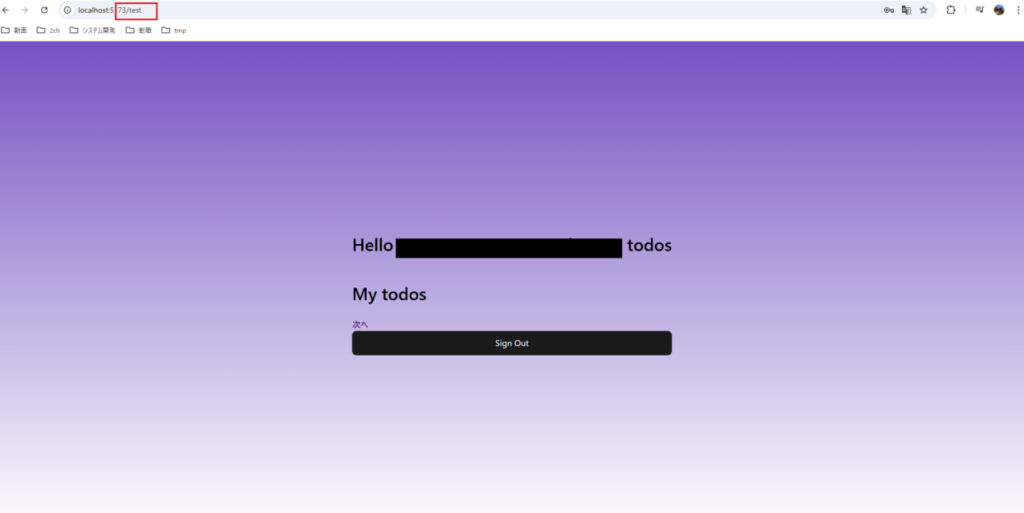
ログイン後、「次へ」ボタンを押下します。

「次へ」ボタン押下後に/testに遷移し、画面が変わっていることを確認します。

おわりに
vue-routerを導入して、ページ遷移ができるようにしました。
App.vueの編集を忘れていて、1日を無駄にしたのでお気をつけください。


コメント